2.2 安装我的第一个数据库——数据库安装
14 Mar 2019
MySQL具有多种版本且支持多平台操作,不同版本在不同平台下的安装与配置过程也不尽相同。在Windows平台下可以使用二进制安装包或免安装包进行安装,二进制的安装包提供了图形化的安装向导过程,而免安装包直接解压缩即可使用,Linux平台下则可以直接使用命令行进行安装。本节将以Windows平台下的二进制安装包为例,详细讲解MySQL下载和安装过程。
2.2.1 下载MySQL安装包
MySQL是完全网络化的跨平台关系型数据库系统,分为社区版(Community)、企业版(Enterprise)和集群版(Cluster)等多个版本,MySQL各版本之间的区别如下图所示:
| MySQL版本 | 版本名 | 费用情况 | 技术支持 | 适用人群 |
|---|---|---|---|---|
| Mysql Community Editon | 社区版 | 开源免费 | 不提供 | 大多数普通用户 |
| Mysql Enterprise Edition | 企业版 | 付费,试用30天 | 官方提供 | 企业级用户 |
| Mysql Cluster CGE | 高级集群版 | 付费 | 官方提供 | 大型企业级用户 |
本书使用当前最新的MySQL 5.7社区版作为教学版本,具体下载步骤如下:
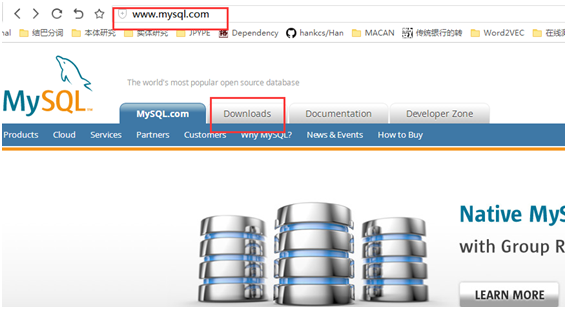
(1)访问MySQL的官方网站(www.mysql.com),如图2.1所示
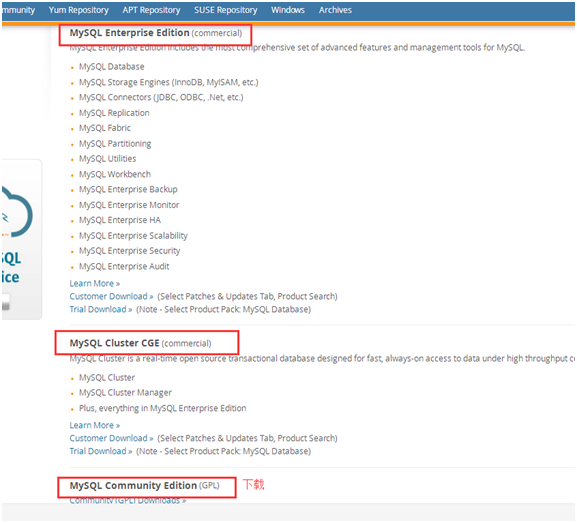
(2)打开MySQL官方网站后,点击Downloads导航栏进入MySQL产品下载页面,该页面包括以下三个版本如图2.2所示:Mysql Enterprise Edition企业版;Mysql Cluster CGE集群版;Mysql Community Editon社区版
(3)单击MySQL Community Edition下载链接跳转到社区版下载页面,如图2.3所示
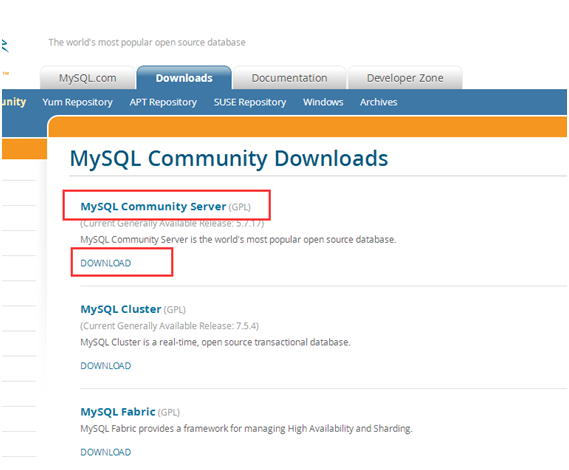
(4)点击Mysql Community Server下的Download超链接跳转到最终的下载页面,如图2.4所示
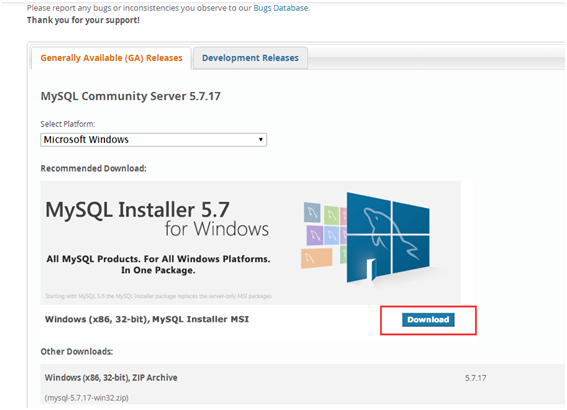
(5)在Select Platform下拉菜单中选择Microsoft Windows,然后点击Download按钮,跳转到文件下载页面,单击Windows(x86,32-bit)右边Download按钮,如图2.5所示
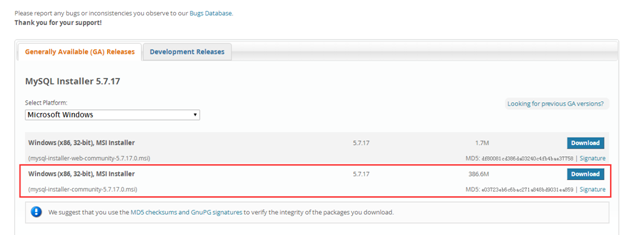
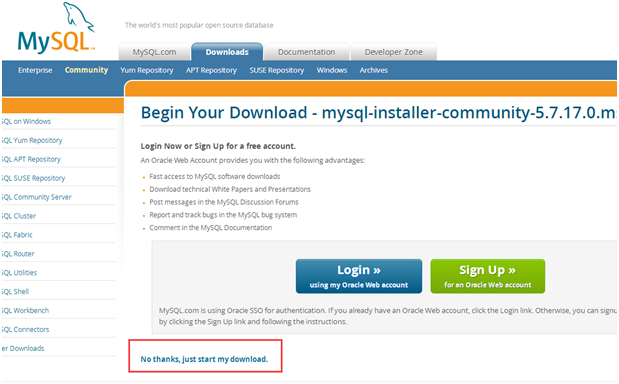
(6)单击Windows(x86,32-bit)右边Download按钮,如图2.5,跳转到最终下载页面,点击No thanks, just start my download直接下载
2.2.2 安装MySQL数据库
上文介绍了下载MySQL数据库的详细步骤,那么如何安装我们的第一个数据库呢?具体步骤如下:
(1)双击安装程序Setup.exe文件,开始安装MySQL数据库,如图2.7所示
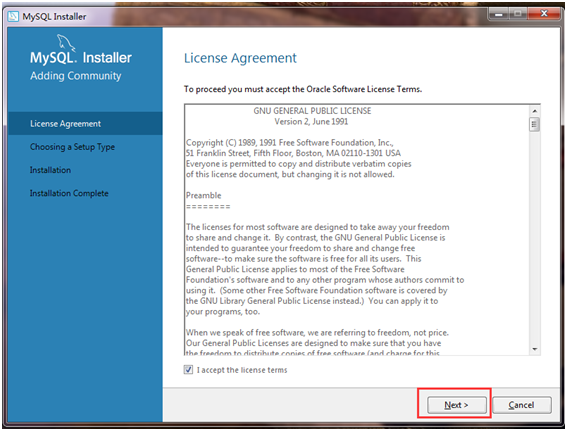
(2)点击Next按钮进入到Choose a Setup Type窗口,如图2.8所示,选择Custom自定义安装类型
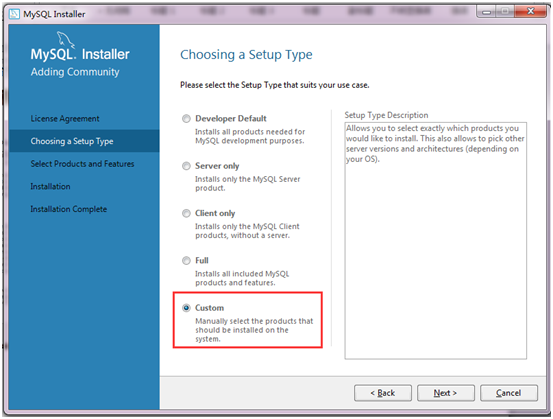
(3)点击Next按钮进入到Select Products and Features窗口,如图2.9所示,在MySQL Server下选择安装对应的Windows操作系统(x64对应64位,x86对应32位),随后在Applications下选择相同操作系统安装MySQL Workbench
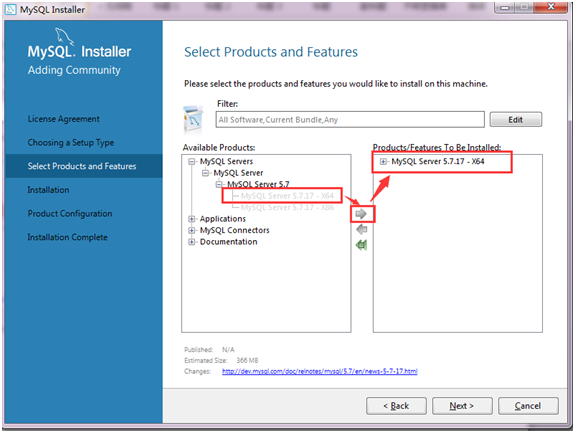
MySQL Workbench简介
MySQL Workbench是MySQL官方发布的一款可视化的数据库设计软件,它为数据库管理员、程序开发者、系统规划师提供了SQL开发(SQL Development)、模型建立(Data Modeling)和数据库管理(Server Administration)等各种强大的功能。
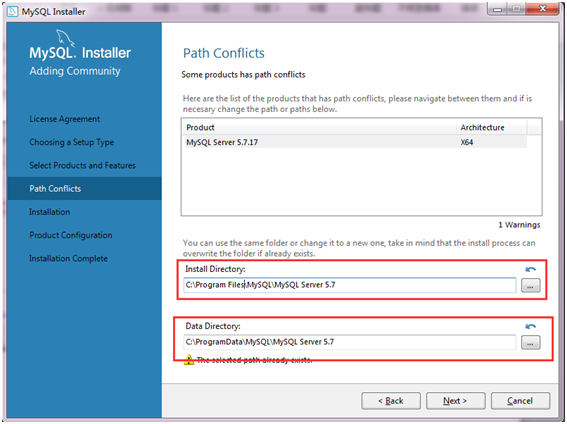
(4)点击Next按钮进入到Path Conflits窗口,如图2.10所示,选择安装路径
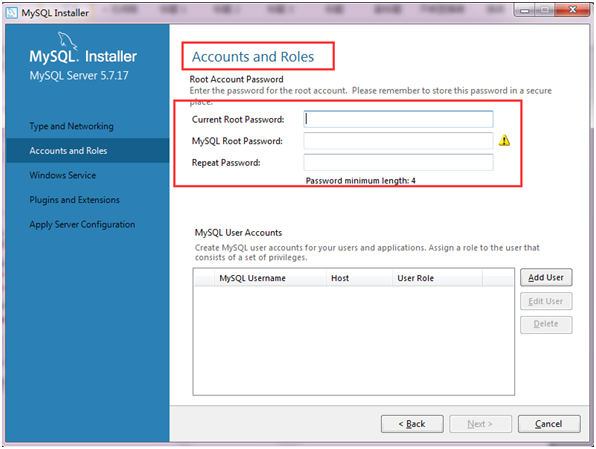
(5)连续点击Next按钮3次进入到Accounts and Roles窗口,如图2.11所示,设定MySQL本地登录密码
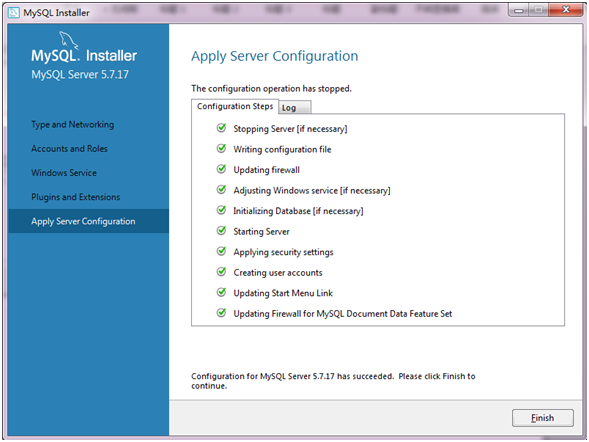
(6)继续多次点击Next按钮进入到最终Apply Server Configuration窗口,当Configuration Steps下所有任务都执行成功,如图2.12所示,最后点击Finish完成安装。
分类: 数据库技术